


You can build an immersive digital twin of a physical property with the right tools. High-quality 3D models improve property listings and elevate client presentations. Photographers only need a capture device and spatial processing software. A clear workflow turns raw visual data into a fully navigable environment. The process involves capturing room data and editing the final output.

What Is a Virtual Tour
Let us define the core concept before looking at the creation process. A virtual tour is a digital simulation of an existing location. It allows users to explore a physical space remotely. Multiple images or scans are stitched together to form a cohesive environment. Viewers navigate through the digital space as if they are walking inside the actual building.
Many real estate professionals want to know how to make virtual walkthrough environments to attract remote buyers. A seamless 360 panoramic view gives potential clients a realistic sense of scale and layout. The digital space frequently includes interactive elements like text labels and dimensions. Photographers capture data and transform real-world locations into digital assets.
Digital twins provide immense value across various industries. Real estate agents use digital models to showcase properties to out-of-town buyers. Construction teams rely on spatial data to document site progress over time. Retailers create digital showrooms to enhance the online shopping experience. Museums digitize exhibits to preserve cultural heritage for a global audience. Hospitality managers highlight hotel amenities to drive direct bookings. The technology bridges the gap between physical boundaries and digital accessibility. Viewers gain a transparent look at a property without traveling. The interactive format builds trust and transparency with potential clients. You can see how versatile a digital environment becomes once captured. An accurate digital twin acts as a permanent record of a specific moment in time.
Step 1 Select the Right Capture Method
Proper hardware dictates the quality of your final output. We can compare different hardware options based on project requirements. A reliable capture device acts as the foundation of your project. The hardware you pick determines the resolution and spatial accuracy of the final model.
Mobile Phone Options
Smartphone cameras offer an accessible entry point for beginners because they eliminate the need to purchase extra equipment. Realsee supports mobile capture workflows, allowing users to start immediately using just their existing devices. However, this method is inherently slower, as the operator must carefully rotate and capture multiple sequential angles to stitch a single panorama. While the convenience factor remains high for casual users and very small rental properties, the multi-step capture process makes it less efficient for larger projects.

Dedicated Hardware (360 Cameras)
For creators who prioritize speed, dedicated 360-degree panoramic cameras offer the ultimate fast workflow. Unlike smartphones, devices with dual fisheye lenses capture a full, seamless room in a single click. This drastically reduces the time spent at each setup point. 360 cameras work exceptionally well for standard homes and rental properties where efficiency is key. Image quality improves significantly over basic smartphone sensors, allowing photographers to complete entire properties in a fraction of the time.
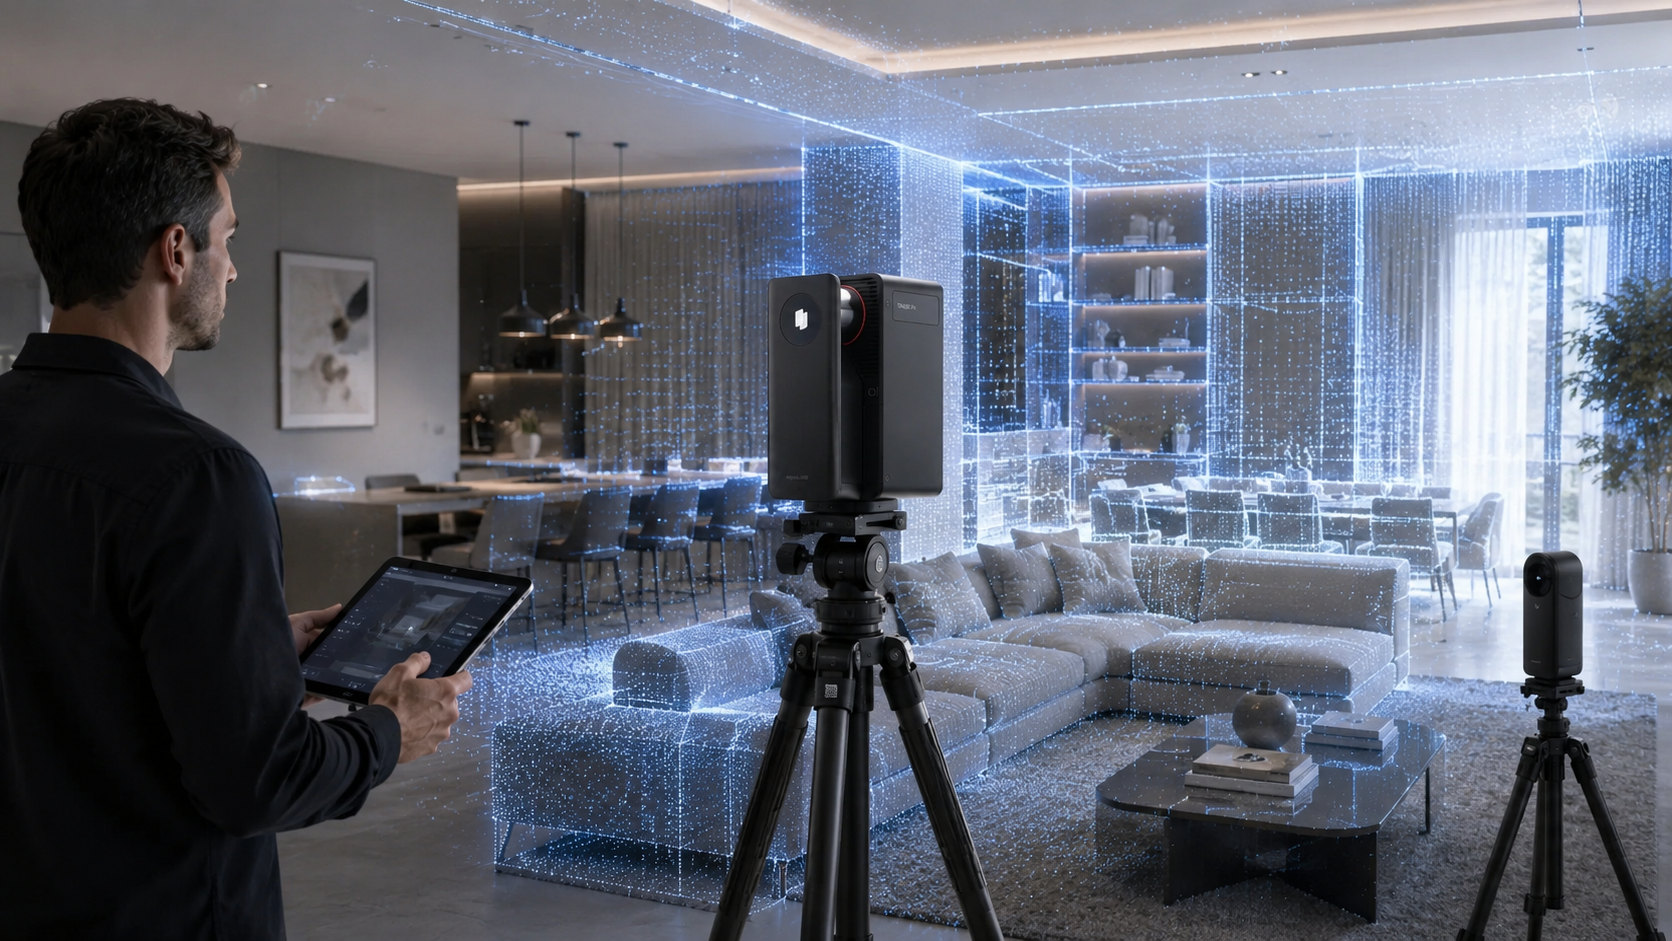
Professional Devices
High-end projects demand professional 3D LiDAR scanners. The Realsee Galois P4 serves as a prime example of advanced spatial hardware. Professional devices capture dense point clouds and high-resolution textures simultaneously. The P4 offers a 100-meter scanning range and 24K visual quality. Such specifications suit high-end residential listings and large commercial spaces. A single scan point takes around 16 seconds. Fast capture rates save significant time on large job sites. Operators can scan huge office buildings or warehouses efficiently. The LiDAR sensors measure millions of data points to map the exact geometry of the room. The resulting spatial data provides an error margin of less than ten millimeters within a fifteen-meter range. Architects and engineers require exact measurements for their technical workflows.

We can evaluate the different capture methods to find the best fit.
|
Capture Method |
Best Use Case |
Primary Advantage |
Typical Deliverable Quality |
|
Mobile Phone |
Small apartments |
No extra gear needed (Slower process) |
Basic visual quality |
|
360 Camera |
Standard homes |
Fast operation |
Good visual quality |
|
LiDAR Scanner |
Commercial spaces |
High precision |
24K visual quality |
Hardware selection impacts the deliverables you can generate later. Better sensors yield more accurate spatial data. The choice ultimately depends on the specific needs of your target audience.
Step 2 Prepare the Space Before Shooting
Physical preparation directly impacts the visual quality of your panoramic images. A clean environment translates to a professional digital twin. People often overlook physical staging when learning how to make virtual tours of homes. The camera captures most details in the room.
Cleaning and Decluttering
Remove personal items from tabletops and counters. Hide trash cans and cleaning supplies inside closets. A clutter-free room looks larger and more inviting to digital visitors. Straighten out rugs and arrange pillows neatly. The camera captures a 360-degree radius. You cannot hide messes behind the camera operator. Pay special attention to kitchens and bathrooms. Clear all appliances off the kitchen counters to show maximum workspace. Put away toothbrushes and personal care items in the bathroom. Close all toilet lids before setting up the camera. A pristine environment helps potential buyers visualize themselves living in the space.
Managing Lighting Conditions
Consistent lighting creates a seamless transition between rooms. Open all window blinds to let in natural sunlight. Turn on all interior lights to brighten dark corners. Replace any burnt-out lightbulbs before you start scanning. Avoid shooting directly into harsh sunlight to prevent blown-out windows. Soft daylight produces the most natural colors in your digital model. Photographers frequently schedule shoots during the morning or late afternoon to catch optimal lighting. Turn off ceiling fans to prevent motion blur during the exposure. Avoid mixing cool and warm lightbulbs in the same room. Uniform lighting elevates the overall professionalism of the presentation.
Step 3 Capture the Space
The physical scanning phase requires careful placement and systematic movement. A logical approach prevents blind spots in your final model. Anyone learning how to make a virtual tour must practice systematic movement. The capture process dictates how smoothly a user can navigate the finished product.
Planning the Scan Path
Start your capture process at the main entrance. Move systematically from room to room in a logical sequence. Keep the camera within line of sight of the previous scan point. A clear line of sight helps the software stitch the images together accurately. Capture extra points in tight spaces like hallways and bathrooms. An organized path allows viewers to navigate the digital space smoothly. Think about the natural flow of a physical walk-through. Place the tripod in doorways to connect adjacent rooms seamlessly. Avoid jumping randomly from the kitchen to the bedroom. A structured scan path helps the spatial processing algorithms build the geometry faster.
Positioning the Equipment
Place the tripod in the center of the room whenever possible. Keep the camera height consistent throughout the property. A height of around five feet mimics natural eye level for most viewers. Use a sturdy tripod to prevent motion blur during the capture. Step out of the frame to avoid appearing in the reflection or the image. Hide behind walls or large furniture pieces during the exposure. Pay attention to large mirrors and reflective surfaces. Position the camera at an angle to mirrors to avoid capturing a direct reflection of the lens. Professional devices like the Realsee Galois P4 support blind capture. The operator can hide in another room while the device works independently. The P4 also supports co-capture workflows for large projects. Multiple operators can scan different sections of a building simultaneously. A collaborative approach reduces the total time spent on massive commercial sites.
Step 4 Generate and Edit Your Virtual Tour
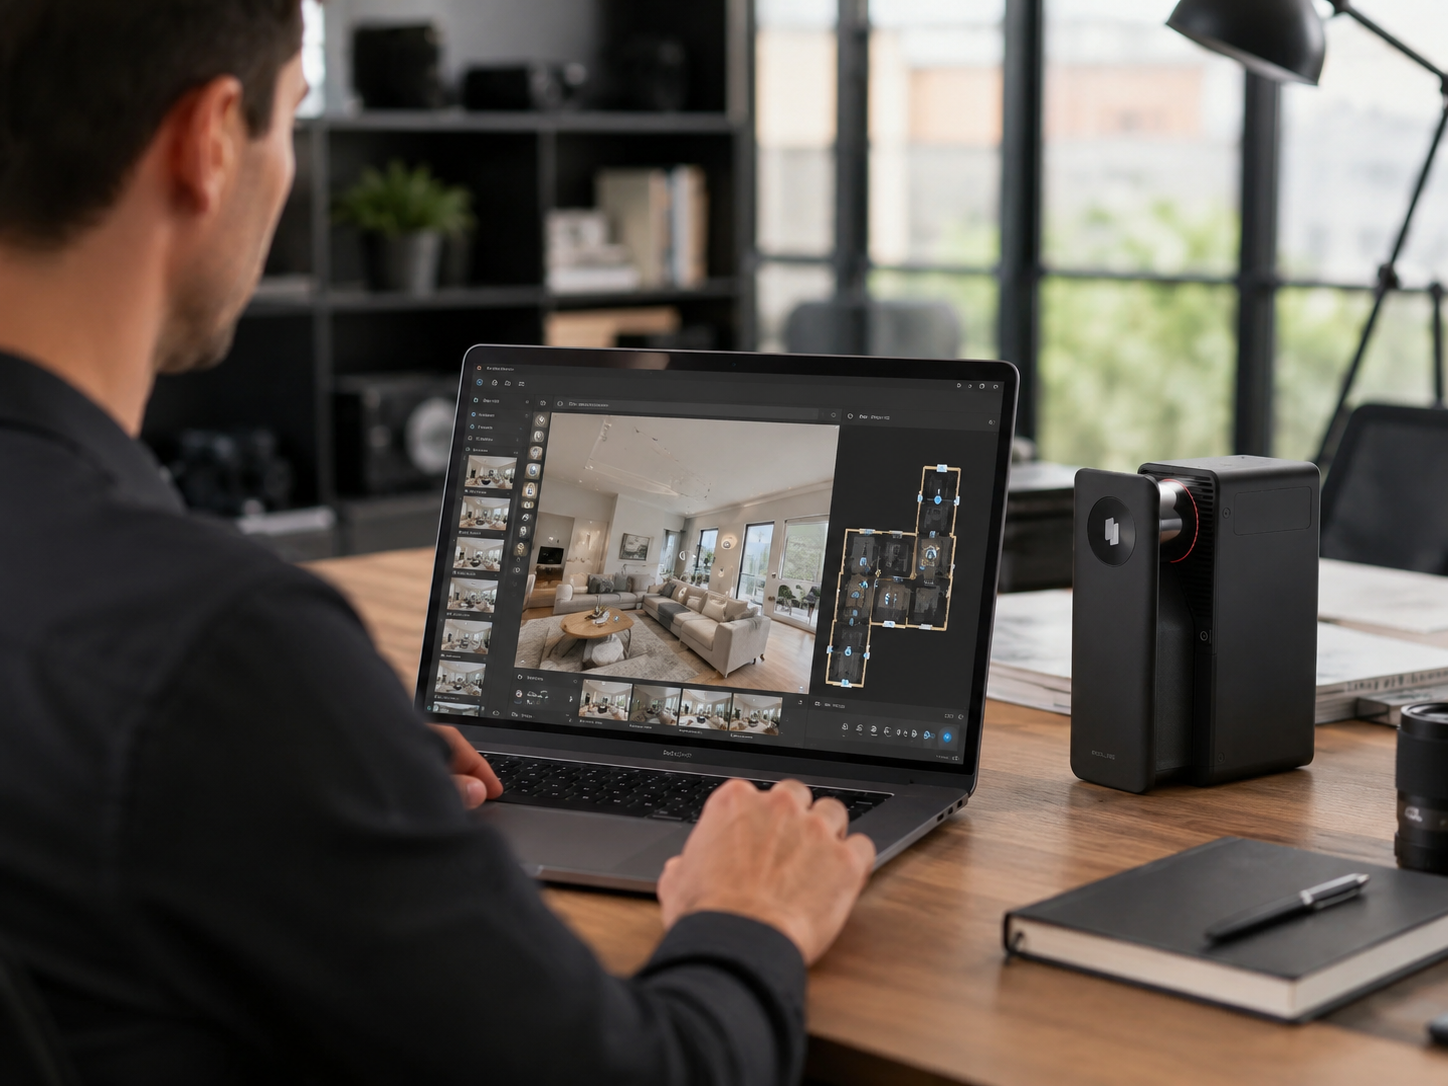
Software transforms raw captured data into a fully interactive digital asset. The post-production phase gives you control over the user experience. You can refine the digital environment before publishing it online.
Processing the Data
Upload your raw scans to a spatial processing platform. Realsee utilizes AI-powered algorithms to reconstruct the 3D geometry of the room. The platform can turn existing panoramas into navigable spaces using advanced depth estimation. You learn how to create 360 virtual tour models quickly with automated stitching. The processing time varies depending on the size of the property. The software aligns the point clouds and wraps the high-resolution textures over the 3D framework. Advanced platforms handle the heavy computational lifting in the cloud. You do not need a powerful local computer to generate the final model.
Adding Interactive Elements
Enhance your digital twin with helpful context. Insert text labels to highlight premium appliances or unique architectural features. Add multimedia tags containing videos or external links. Interactive elements engage viewers and keep them exploring longer. You can embed a floorplan online to give users a top-down perspective of the layout. Navigational menus help users jump directly to specific rooms. Real estate agents frequently add contact forms inside the digital space. E-commerce brands place direct shopping links on physical products shown in the scan. Interactive tags turn a static viewing experience into a dynamic discovery process.
Managing Costs and Deliverables
Evaluate the long-term costs of hosting your spatial data. Many platforms force users into rigid monthly subscriptions. Realsee offers a flexible pay-as-you-go system based on credits. You only pay when you activate a model or download files. The flexible model benefits photographers who do not want recurring overhead. The credit system scales naturally with your business volume. You keep control over your budget on a per-project basis. Cost management plays a huge role in the profitability of spatial photography businesses.

Step 5 Share Embed and Use the Tour for Marketing
A completed digital model only delivers value when shared with your target audience. You must distribute the spatial asset effectively. Anyone asking how to create a virtual tour for real estate must also master distribution. A great model needs a solid marketing strategy.
Embedding on Websites
Integrate the digital model directly into your property listing page. Most platforms provide an iframe code for easy embedding. Website visitors can explore the property without leaving your page. High engagement times signal valuable content to search engines. You can also share direct links through email newsletters and social media posts. The interactive format captures attention quickly on mobile devices. Real estate portals actively prioritize listings that feature immersive 3D content. You generate more qualified leads when prospects can evaluate the property online first. Realsee also provides guidance for embed code use.
Exporting Additional Data
A digital twin serves multiple purposes beyond a simple web link. Realsee promotes an open delivery model for spatial data. Users retain ownership of the content they capture. You can download high-resolution RAW images for print marketing. Construction teams can export dense point clouds and CAD files. Architects can generate accurate manual floor plans from the initial scan data. The space you capture becomes a reusable asset rather than a locked file. Agencies extract 2D snapshots from the 3D model to create standard marketing brochures. You maximize the return on investment when one scan yields multiple professional deliverables. Autodesk also documents how scan data can be converted into point cloud projects for design workflows through point cloud creation.
Start Creating Your Digital Space Today
You have the knowledge to build impressive digital environments right now. Good preparation and the right equipment yield professional results. Photographers and agents can elevate their property marketing efficiently. Realsee provides flexible tools for mobile users and professional LiDAR operators alike. Begin capturing spaces and turn physical locations into reusable spatial assets for your next big commercial project.
FAQs
Q1: How long does it take to scan an average residential property?
Most professional scans require about one hour for a standard home. A device like the Realsee Galois P4 completes a single scan point in roughly 16 seconds. The total duration depends entirely on the square footage and room count.
Q2: Can I download the raw data from my scans?
Yes, you retain full ownership of your spatial data files. Platforms like Realsee permit users to download RAW images, CAD files, and point clouds. The open delivery model means you maintain access to your project assets permanently.
Q3: Do I need a monthly subscription to host my digital models?
No, you can utilize a flexible pay-as-you-go credit system. You only pay when activating a new model or downloading specific deliverables. Flexible pricing models reduce the pressure of recurring monthly fees for occasional projects.
Q4: Will a standard mobile phone work for commercial spaces?
Mobile phones are not recommended for large commercial environments. Because smartphone capture requires taking multiple photos to form a single panorama, it becomes a very slow and tedious process for multi-room or large-scale properties. Furthermore, commercial projects demand the higher precision, superior dynamic range, and rapid one-click efficiency that only professional 360 cameras or LiDAR scanners can provide.
Q5: How accurate are the measurements extracted from spatial scans?
Professional scans provide extremely precise measurements for architectural and engineering use. High-end LiDAR devices maintain an error margin of less than ten millimeters within a fifteen-meter range. Real estate agents can rely on the data to generate precise floor plans.
Leave a comment
This site is protected by hCaptcha and the hCaptcha Privacy Policy and Terms of Service apply.