


To capture multiple floors using the Realsee App, please follow these steps:
📍 1. Distinguishing the transition between floors
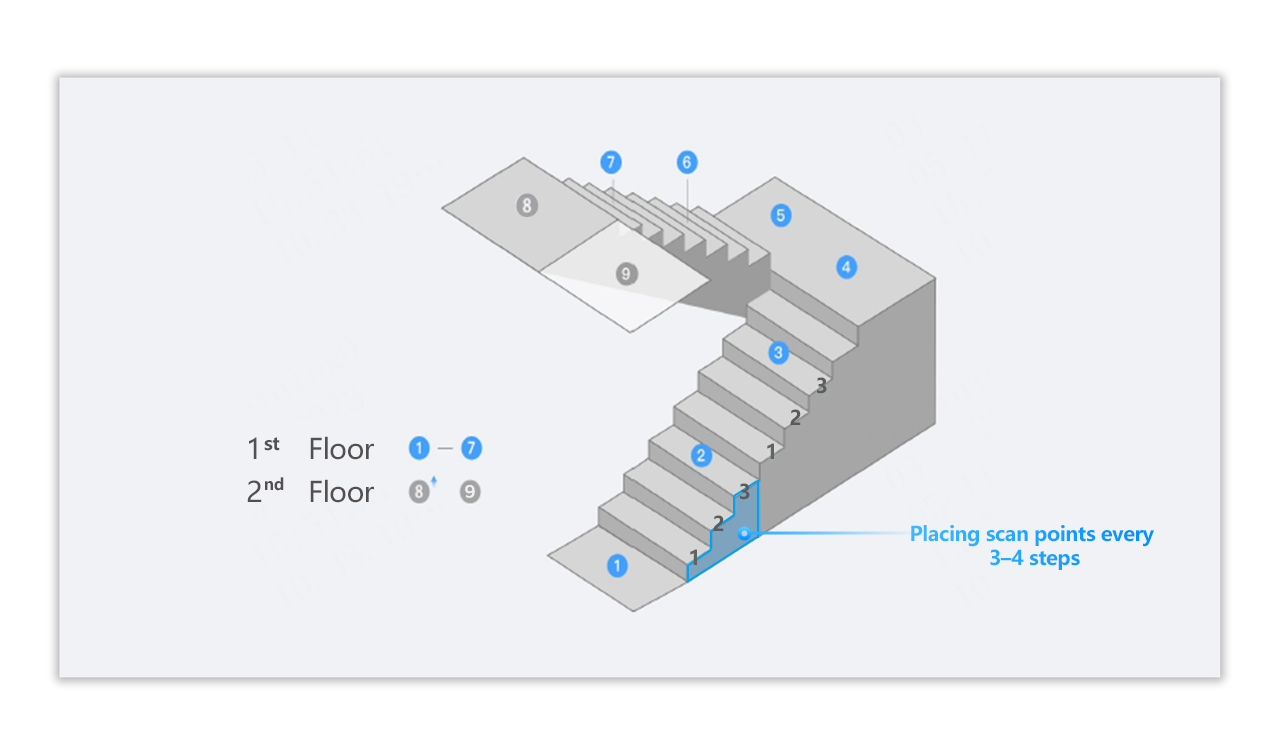
- Refer to the image below for an example of correct floor division:
Points 1–7 belong to the first floor, including the point placed on the stairs before switching floors
Point 8 is the first point of the second floor, placed after the floor switch
🧭 2. Finish capturing the first floor
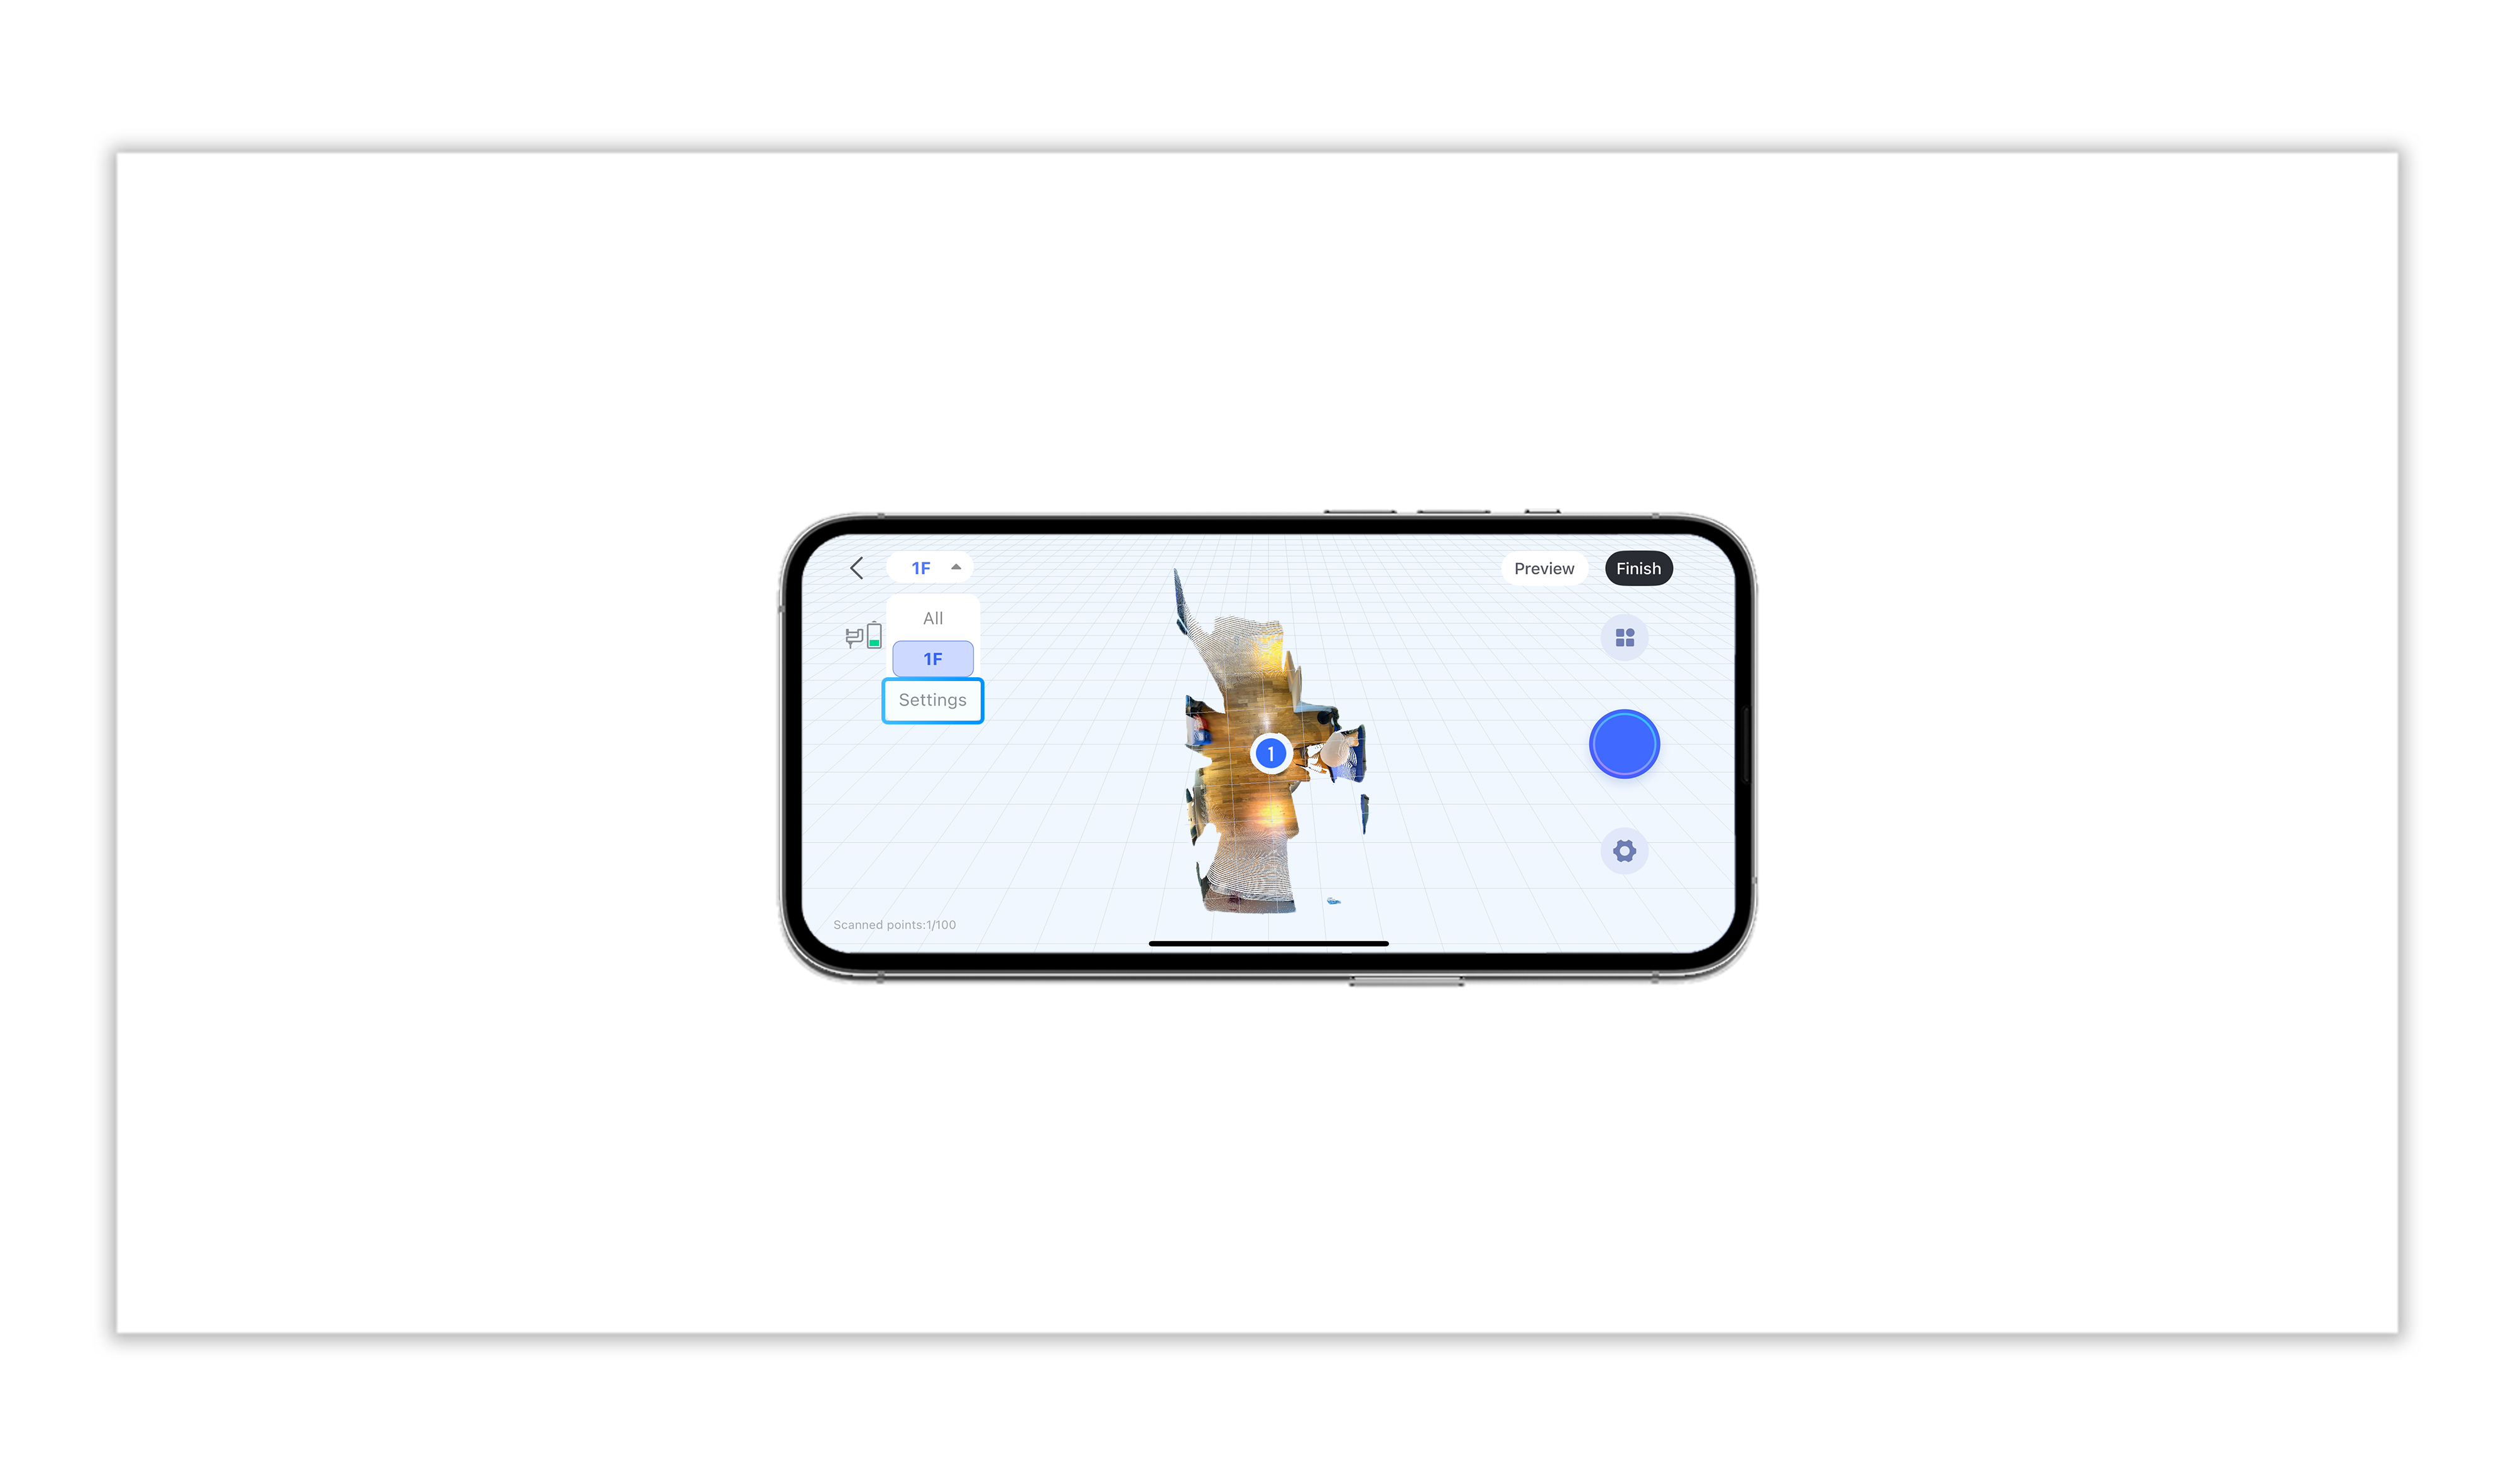
- After placing the last capture point on the staircase while still on the first floor, do not proceed directly to the second floor. Instead, tap the Floor Management function in the upper-left corner of the screen.
🛠️ 3. Add a new floor in the Realsee App
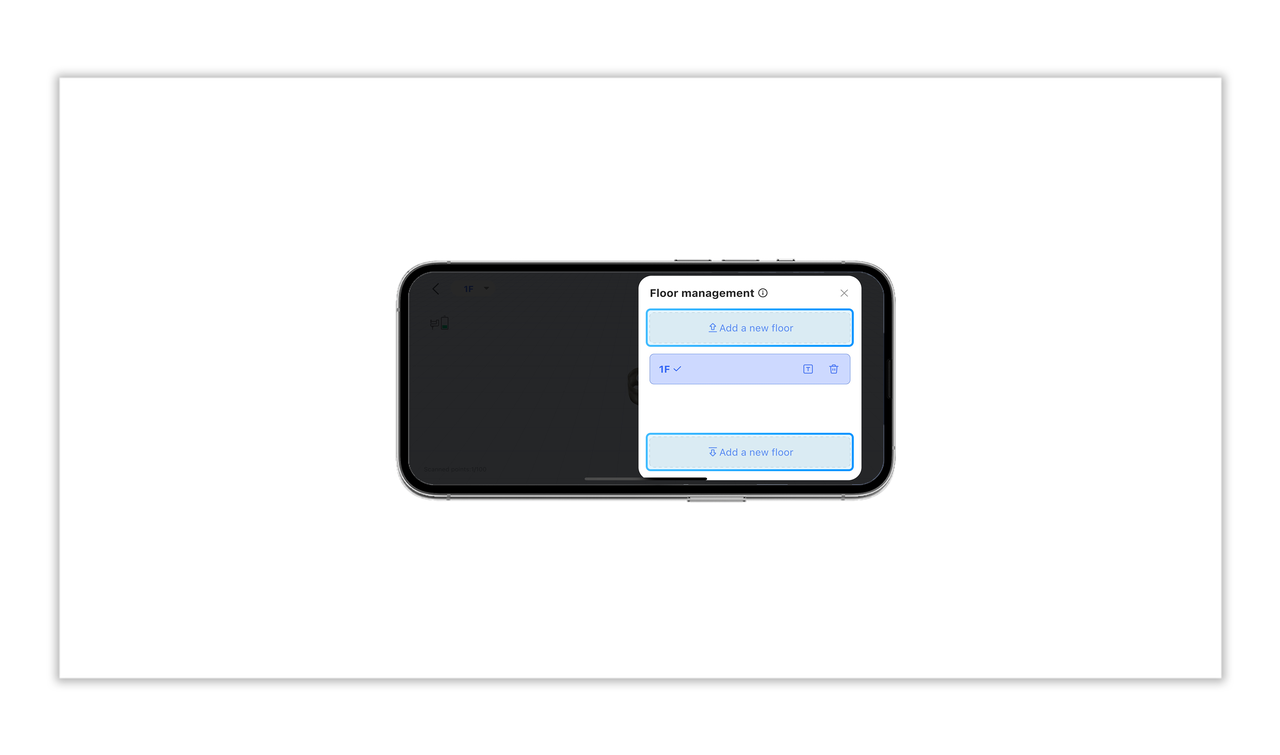
- Go to Settings and select "Add a new floor (up) "or "Add a new floor (down)" to create a new floor.
🔄 4. Start capturing the second floor
- After adding the new floor, begin by capturing the first point of the second floor——usually at the top of the stairs. Proceed with the rest of the second-floor scanning following standard Galois capture procedures.