


Publishing a Realsee 3D tour to Google Street View is a powerful way to boost local SEO, showcase your space, and drive qualified leads from Google Maps. Realsee provides a native, one-click integration inside the Realsee Console that lets you turn your 3D digital twins into interactive Google Street View experiences without any third‑party plugins.
By connecting your Google account and aligning your 3D floor plan directly on the map, Realsee automatically stitches and links your 360°/3D panoramic spots into a navigable Street View tour.
Key Takeaways
-
One‑click publishing: Upload fully aligned Realsee 3D tours directly to Google Maps and Google Street View via Realsee Console.
-
Precise spatial calibration: Drag and rotate the 3D floor plan footprint to match real‑world building boundaries and entrances on Google Maps.
-
SEO and lead generation: Improve local search visibility, elevate perceived property value, and convert organic Google Maps traffic into inquiries.
-
Fast turnaround: Typical projects with around 50 scan spots are processed and published in about 30 minutes.
Realsee’s Google Street View integration is ideal for commercial property owners, residential landlords, and professional 3D photographers who want their indoor spaces to be easily discoverable and explorable on Google Maps and Google Street View.
In this guide, you’ll learn:
-
Why it’s worth publishing your Realsee 3D projects to Google Street View
-
What you need before you upload
-
Exact step‑by‑step instructions from Realsee Console to Google Maps
-
A live example of a published tour
-
Answers to the most common questions and upload issues
You can also follow along with our video walkthrough: Watch YouTube tutorial
Why Publish Your 3D Projects to Google Street View?
For Commercial & Residential Real Estate Owners
- Immersive Indoor Walkthroughs: Allow potential clients and remote buyers to intuitively explore your property's layout and interior decor directly on Google Maps.
- Highlight Key Selling Points: Show off interior architecture, scenic views, and premium design accents to elevate spatial and market value.
- Capture Global Traffic: Reach out-of-town or international clients who can't inspect the space in person.
- Boost Local SEO Traffic: Drive high-intent traffic from Google Maps search listings straight to your official website or booking portal.
For 3D Photographers & Service Agencies
- Build Professional Influence: Leverage Google Maps as a public portfolio to demonstrate high-precision 3D scanning quality.
- Generate Qualified Leads: Attract real estate brokers, facility managers, and business owners searching for local 3D capture services.
- High-Value Client Add-On: Offer client-side Google Street View publication as a premium upsell feature in your photography packages.
📋 Prerequisites Checklist Before You Start
- A Realsee Console account (realsee.ai) with management access to your project.
- Your project status set to Active in the Realsee Console.
- A Google Account (Personal or Workspace) authorized to publish to Google Maps.
- The exact real-world street address of the property.
Step-by-Step: How to Upload to Google Street View
Step 1: Access Your Project in Realsee Console
Log in to Realsee Console, go to your 3D Tour List, and select the project you wish to publish to enter its details page.
Step 2: Open the Google Street View Tab
In the top navigation tab of your project page, click Google Street View, then click the Upload to GSV button.

Step 3: Pin Address & Calibrate Orientation
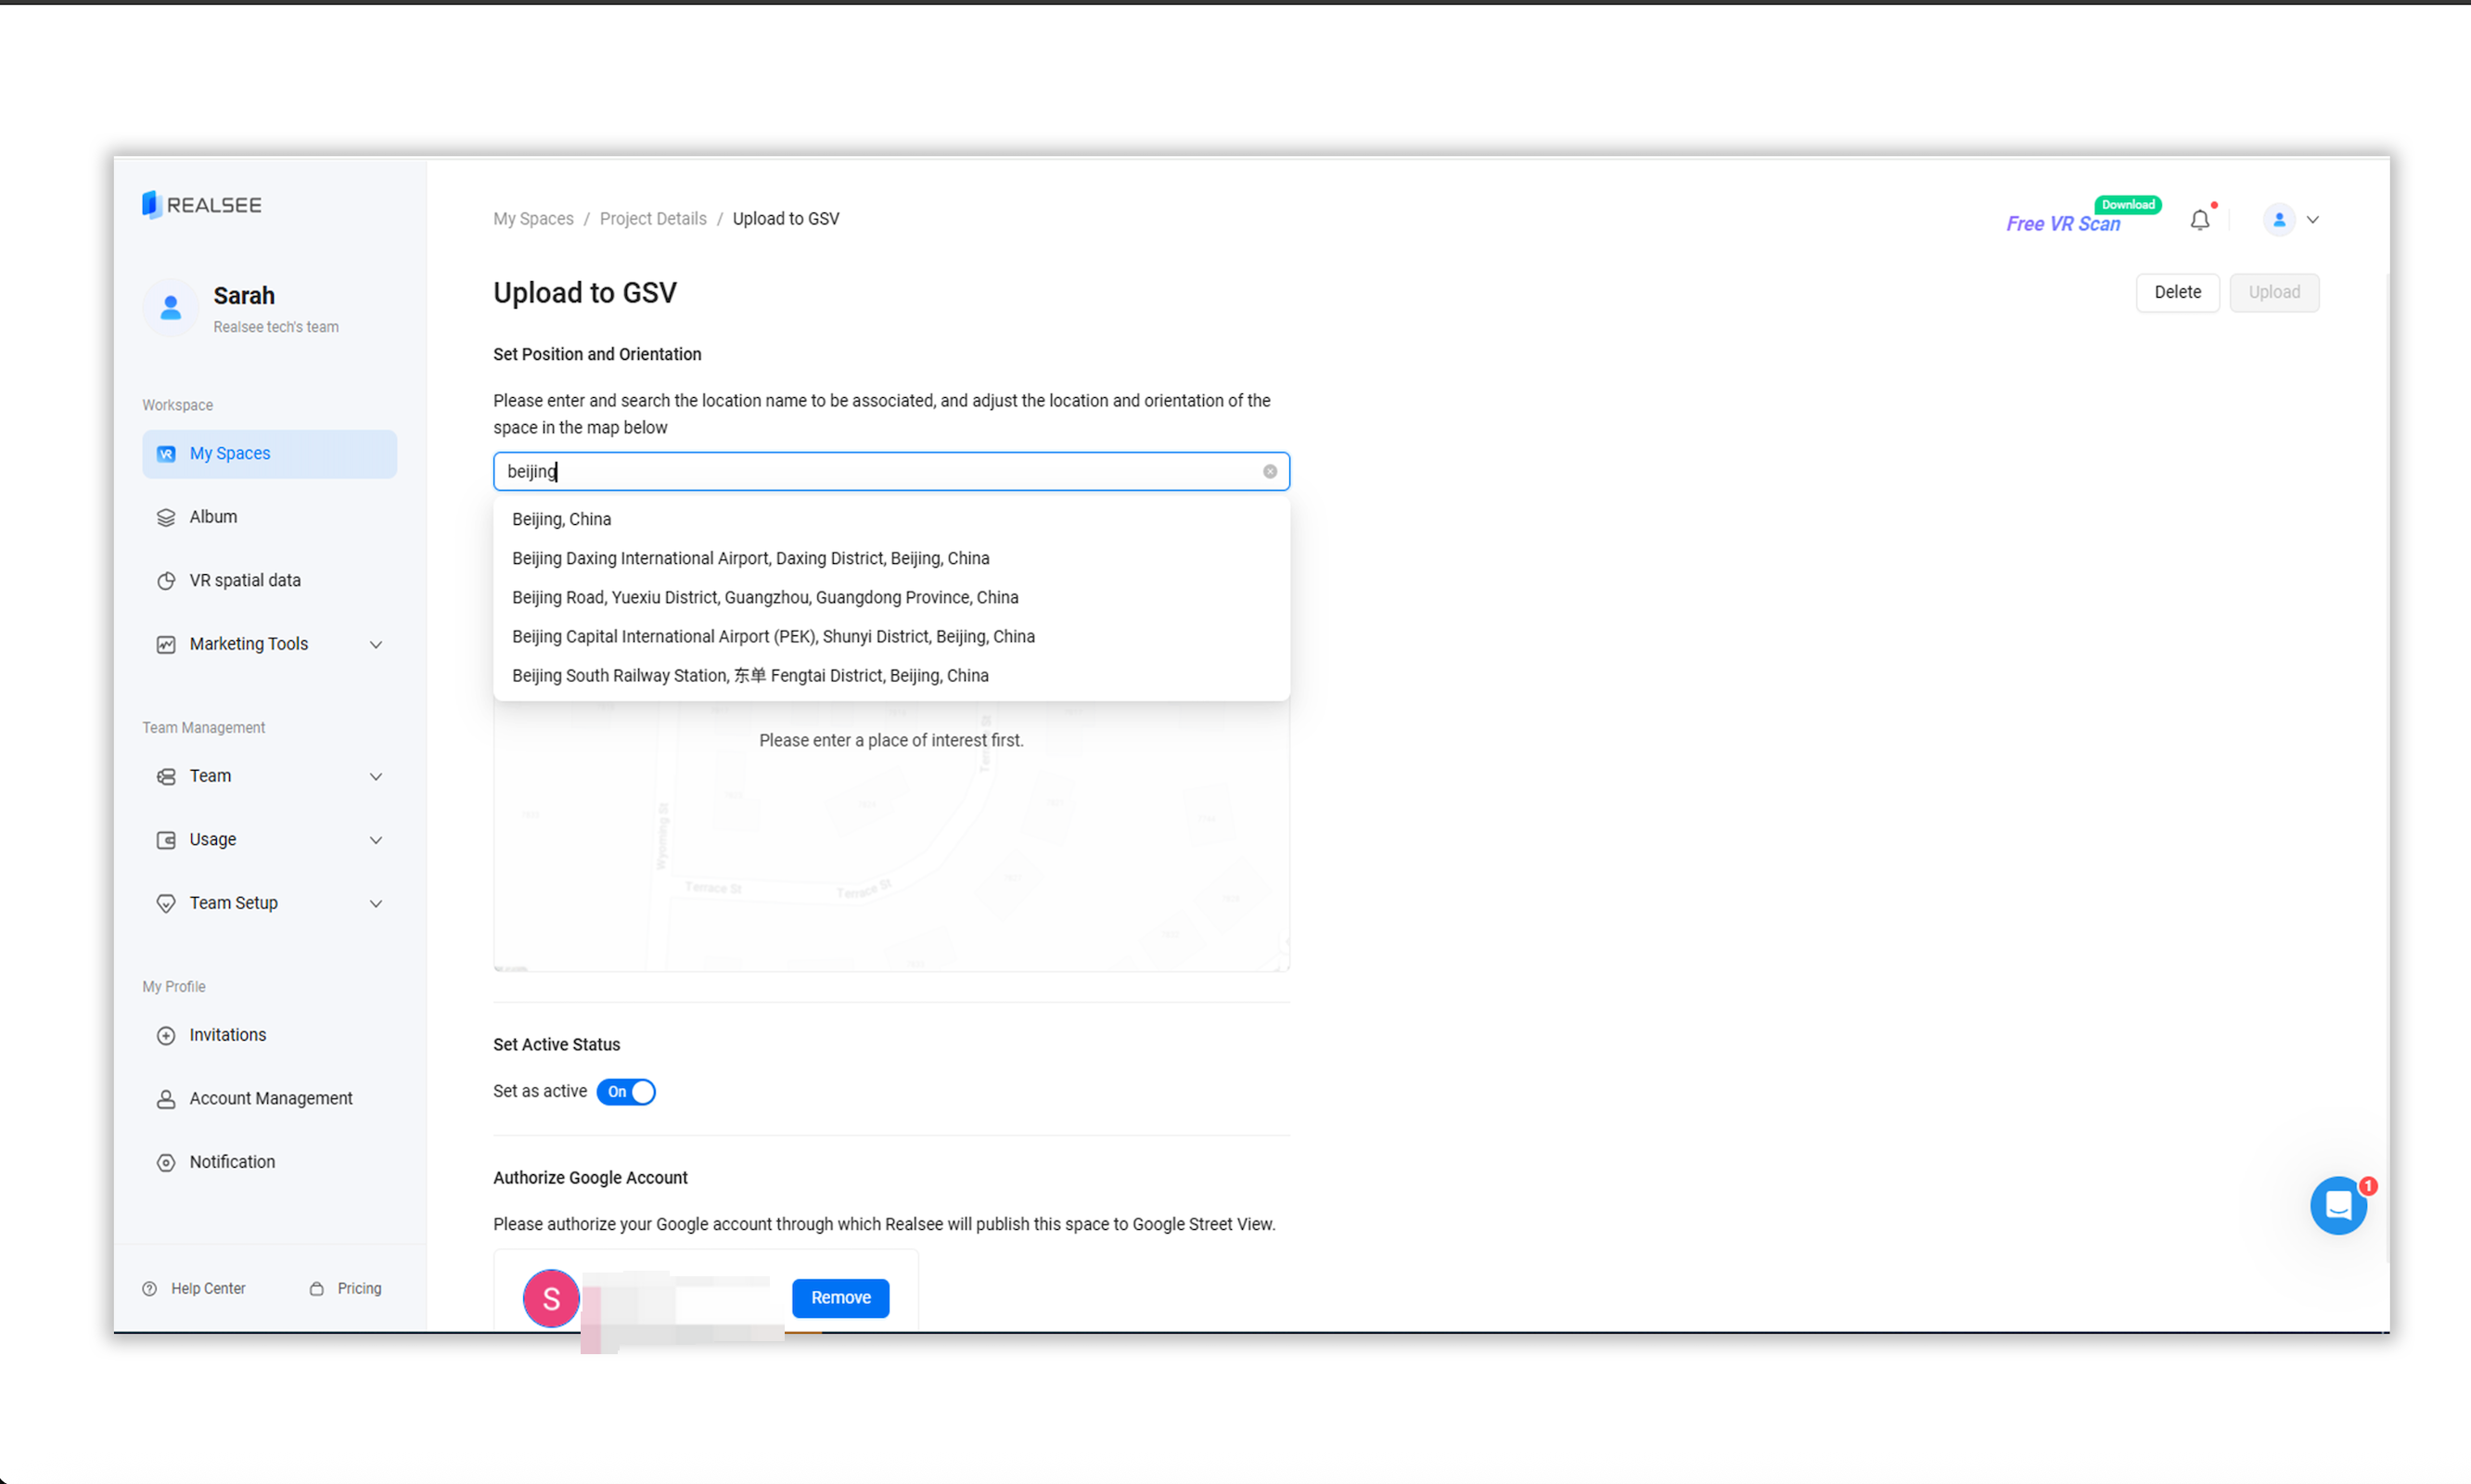
Enter the real-world physical address in the location search field and select the matched result from the dropdown list.
💡 Pro Tip for Spatial Alignment: Once the map renders, a top-down footprint of your 3D model will appear at the center. Drag and rotate the 3D model footprint so that its walls and main entrance align precisely with the real building boundaries on Google Maps.
Step 4: Ensure Project is Active
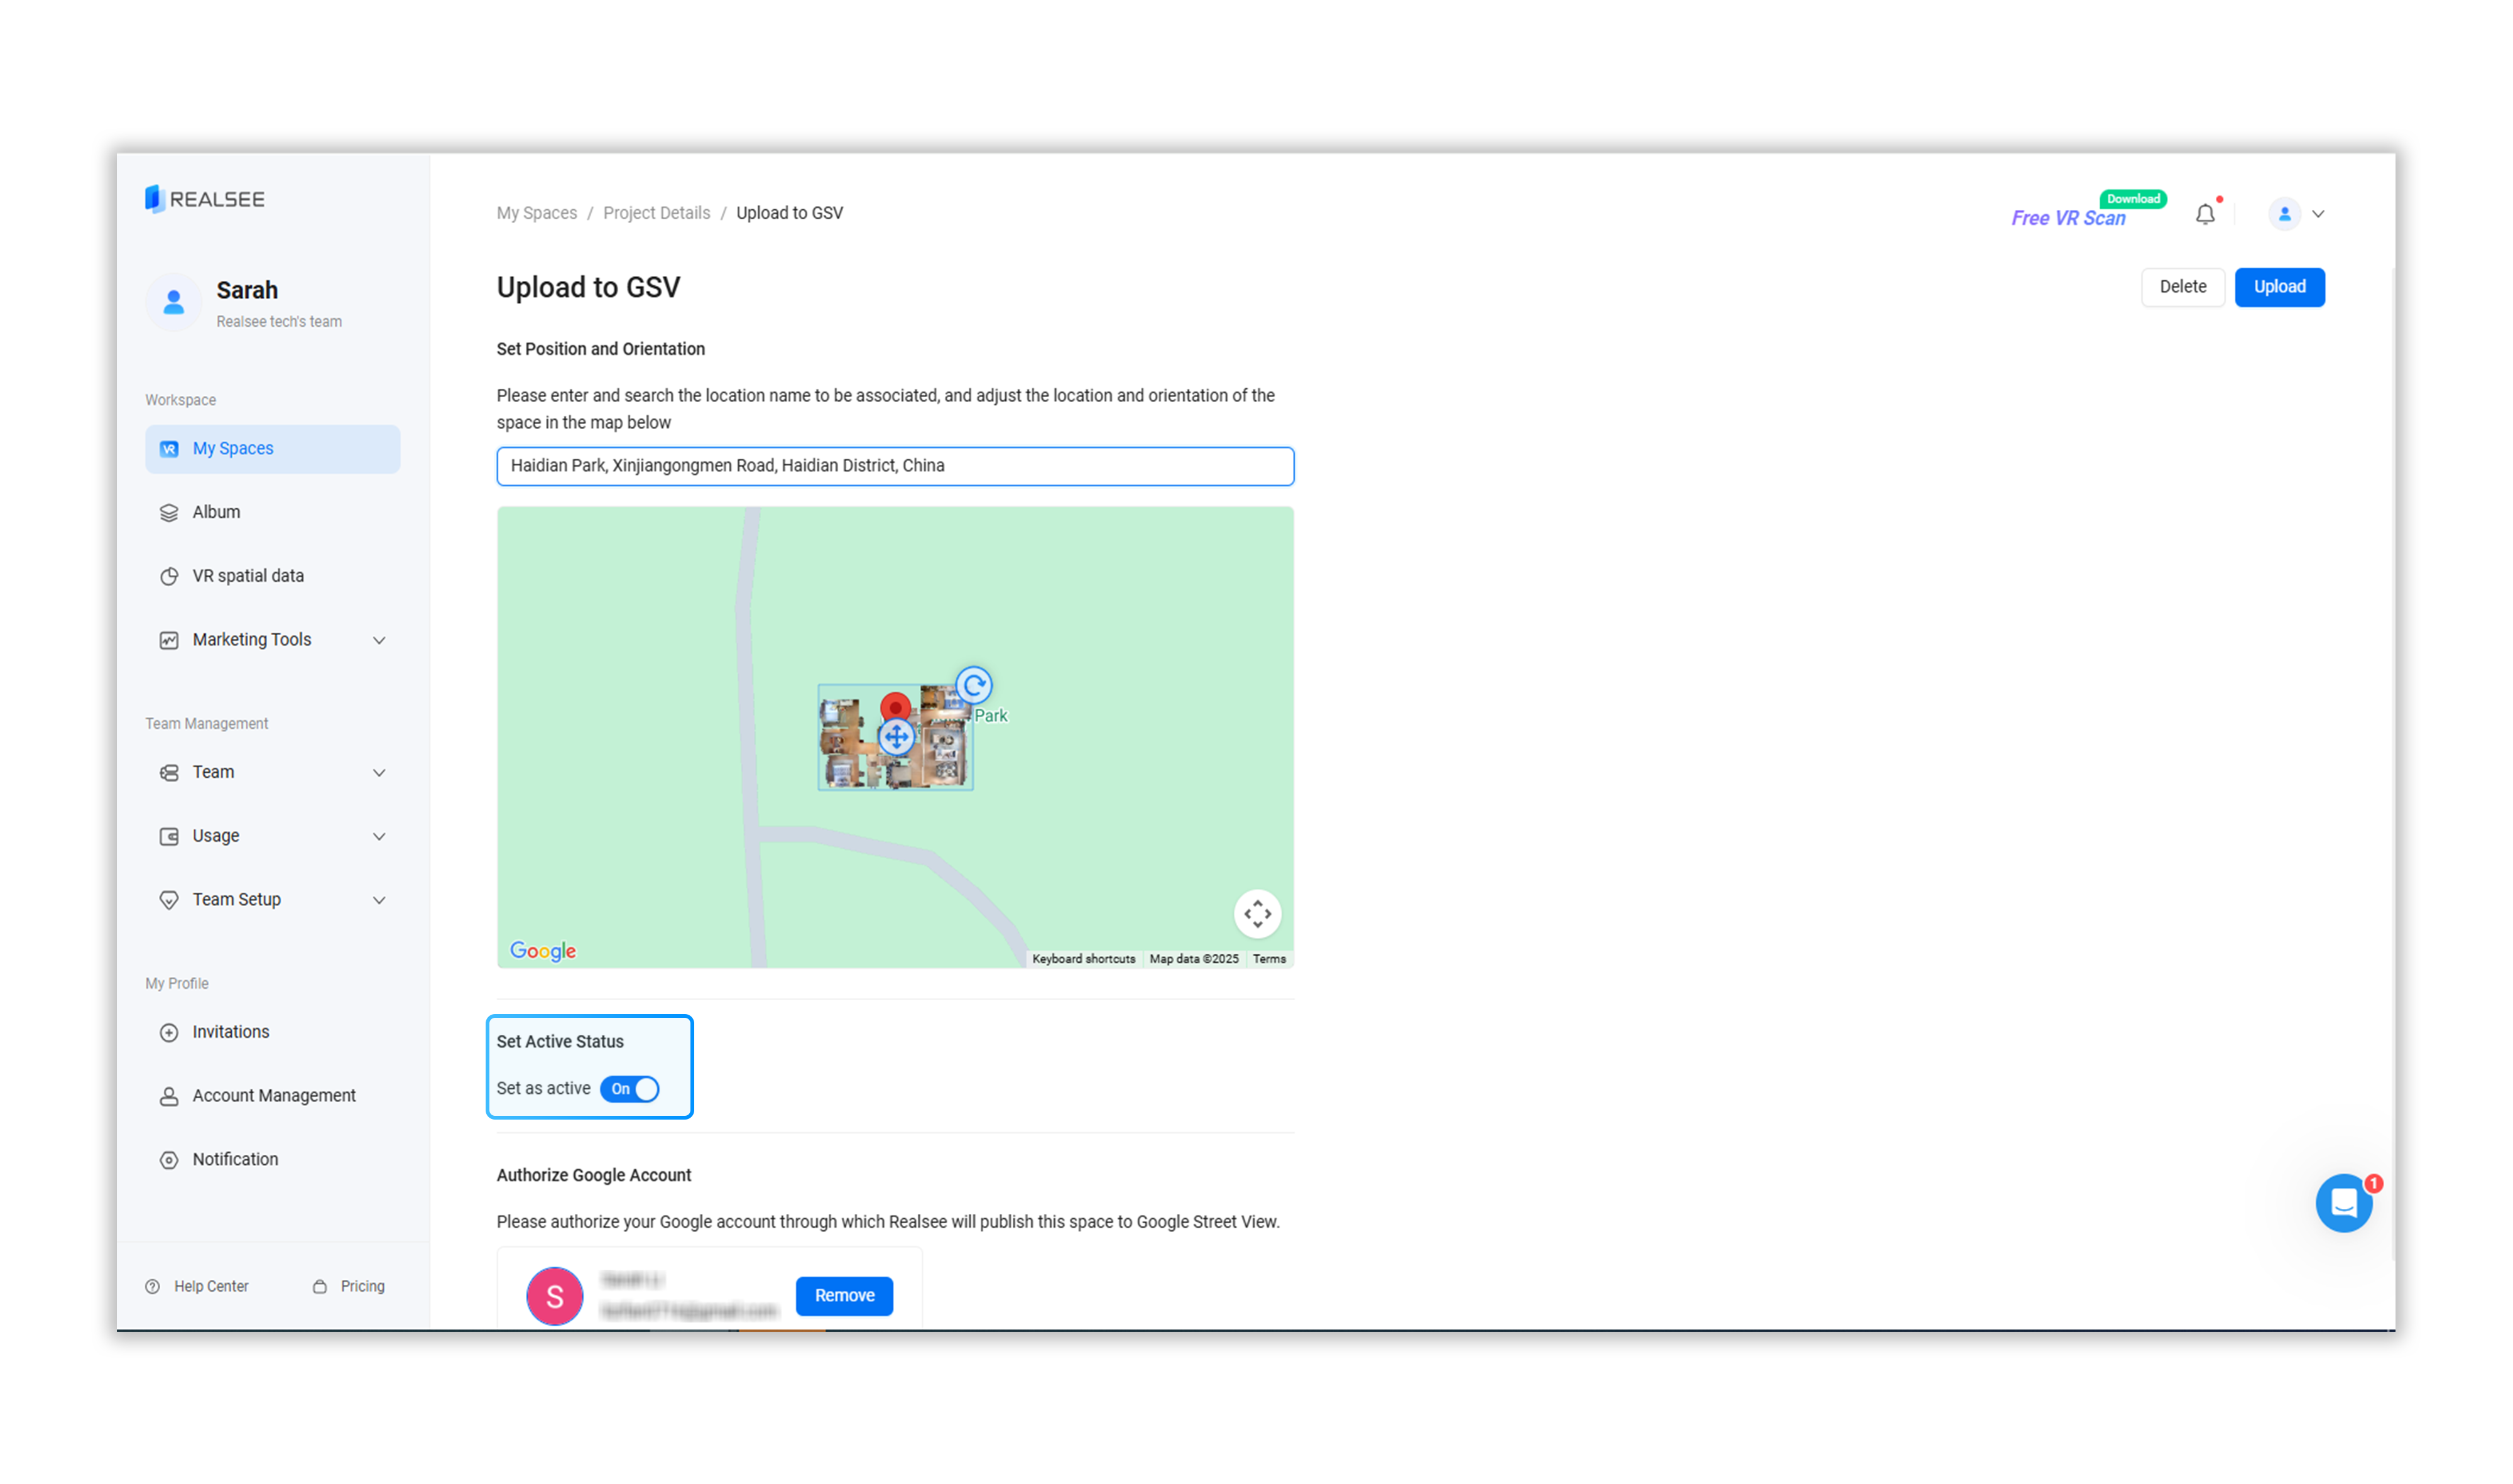
Double-check that your project status is set to Active. Inactive 3D tours cannot be published to Google Street View.
Step 5: Authorize Your Google Account
Click to log in and bind your target Google account. Important: Make sure to check the permission box that says "Publish on Google Street View" during the account authorization popup.

Step 6: Submit Upload & Allow Processing Time
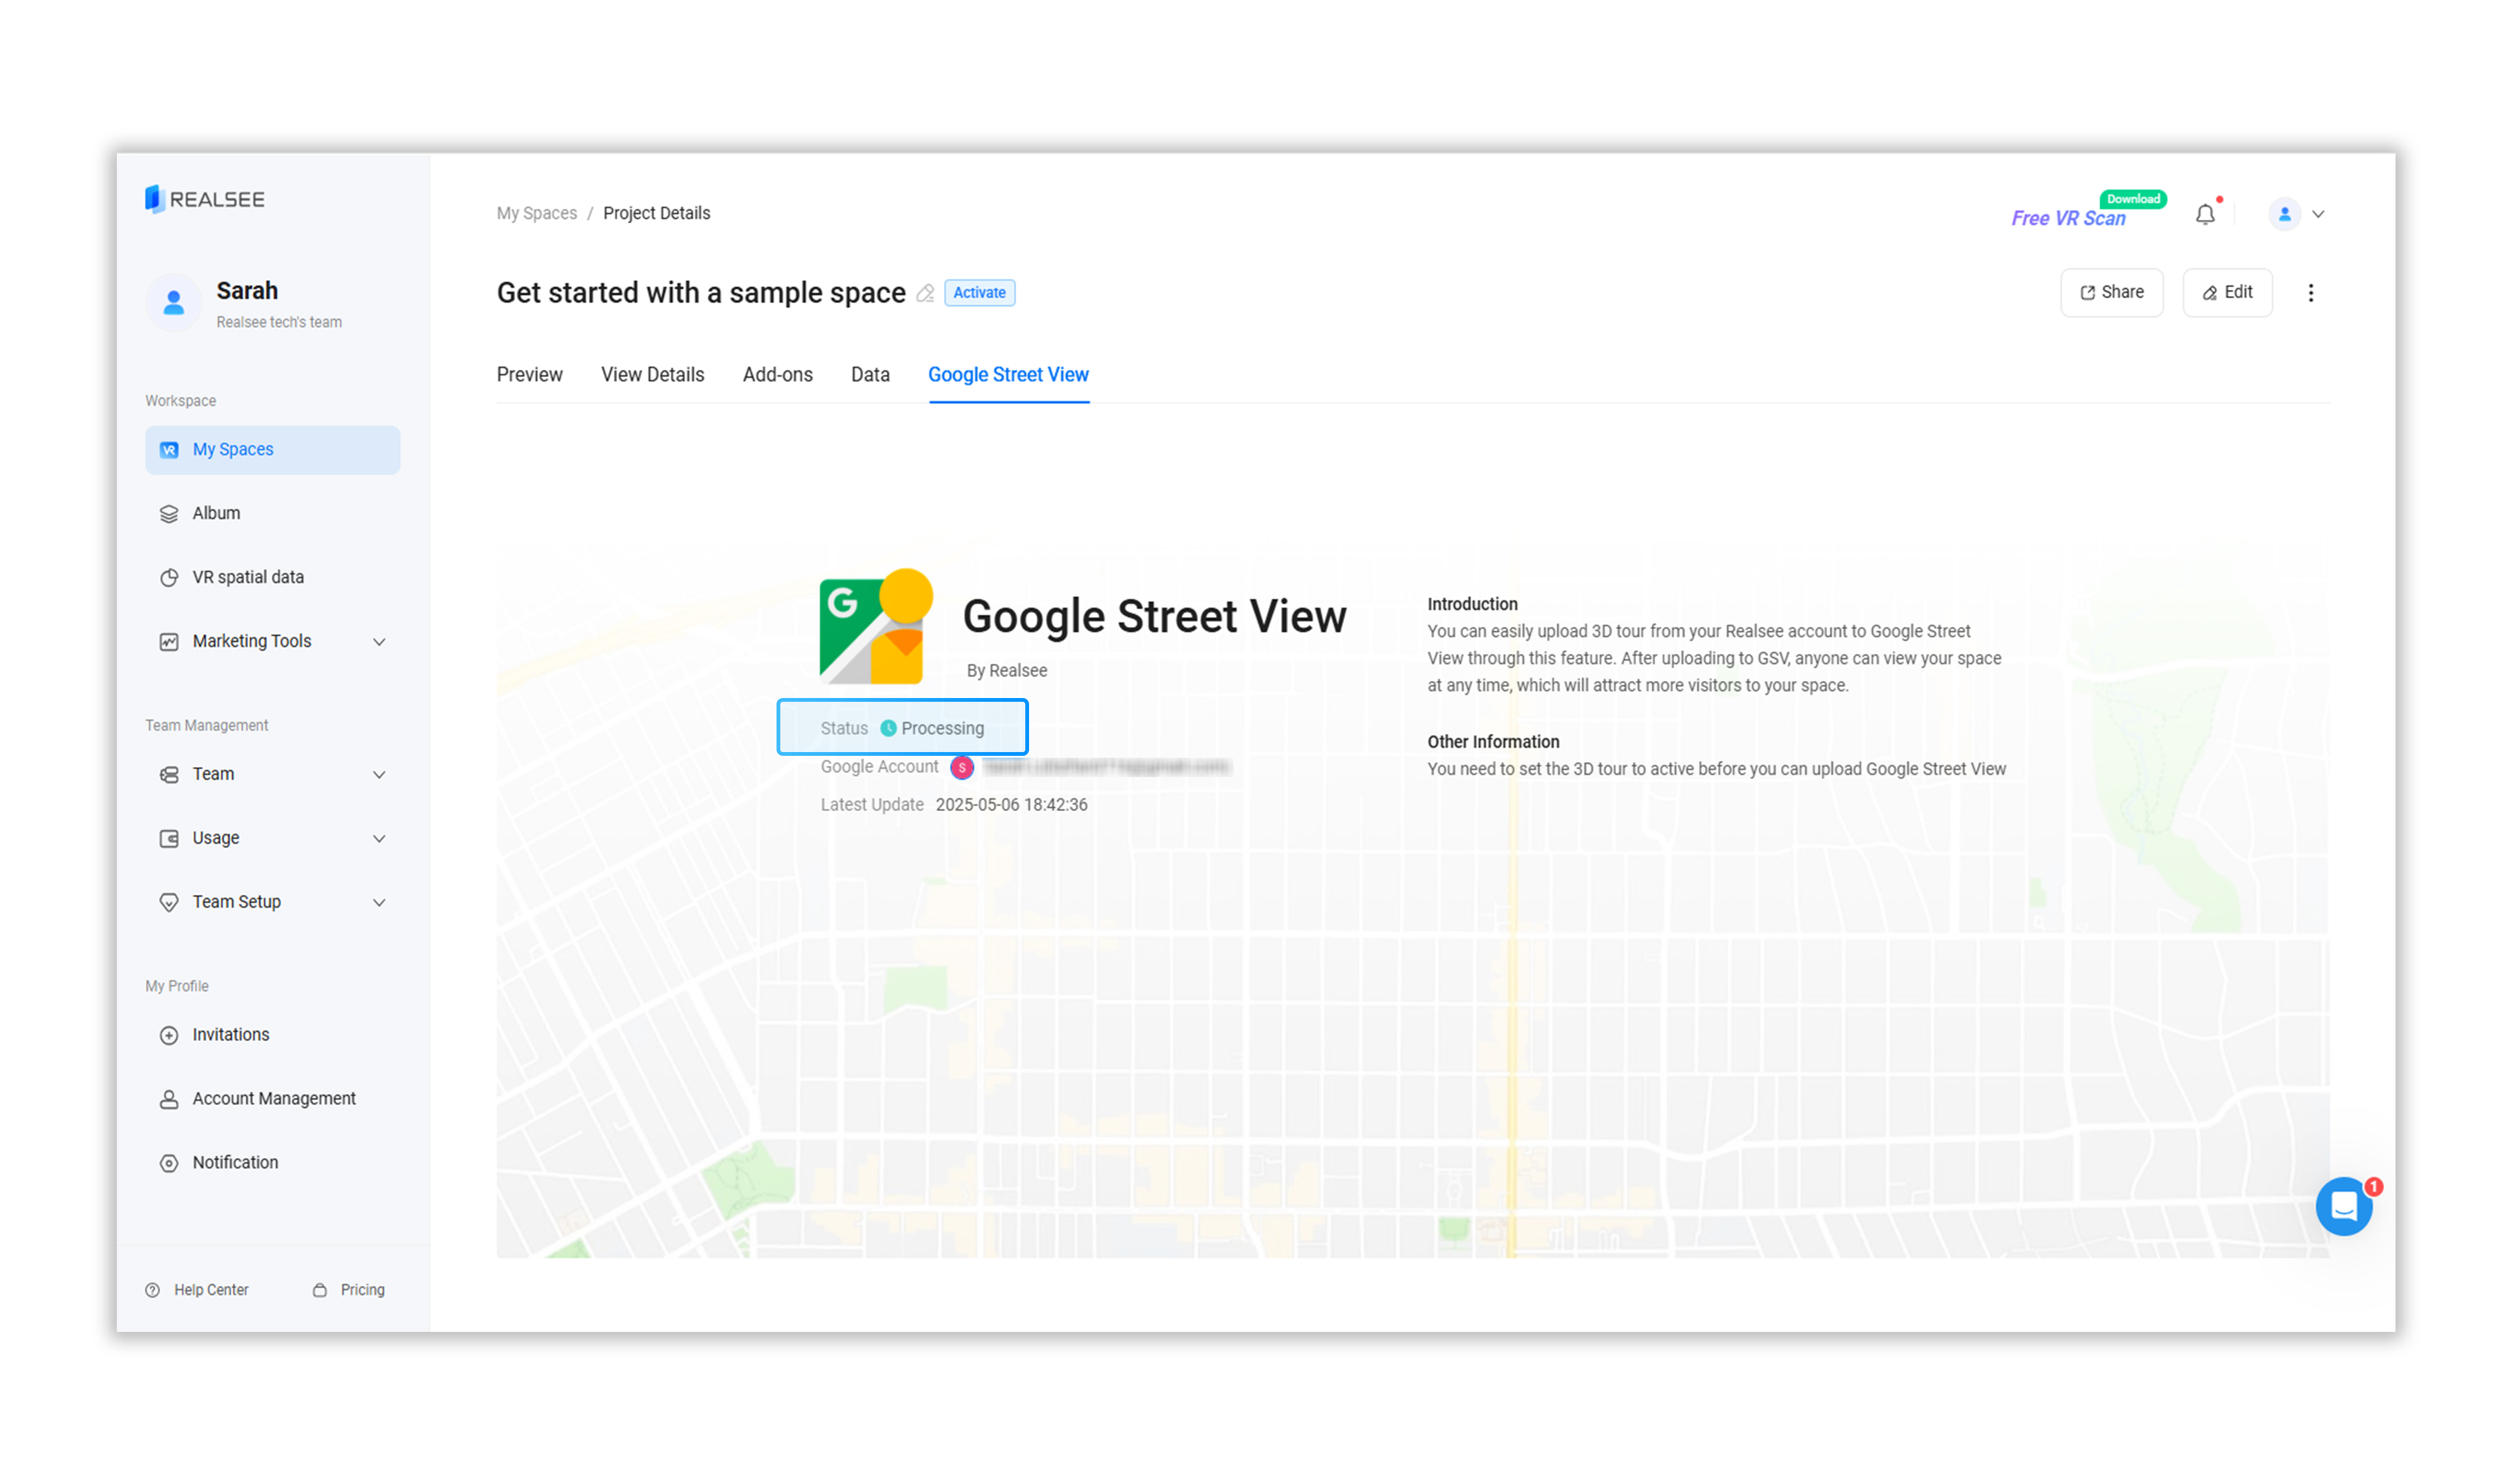
Confirm all information and click Upload. Processing time depends on the total scan spots. As a general rule, a project with 50 scan spots takes around 30 minutes to compile and publish on Google's servers.

Step 7: Verify Live Result on Google Maps
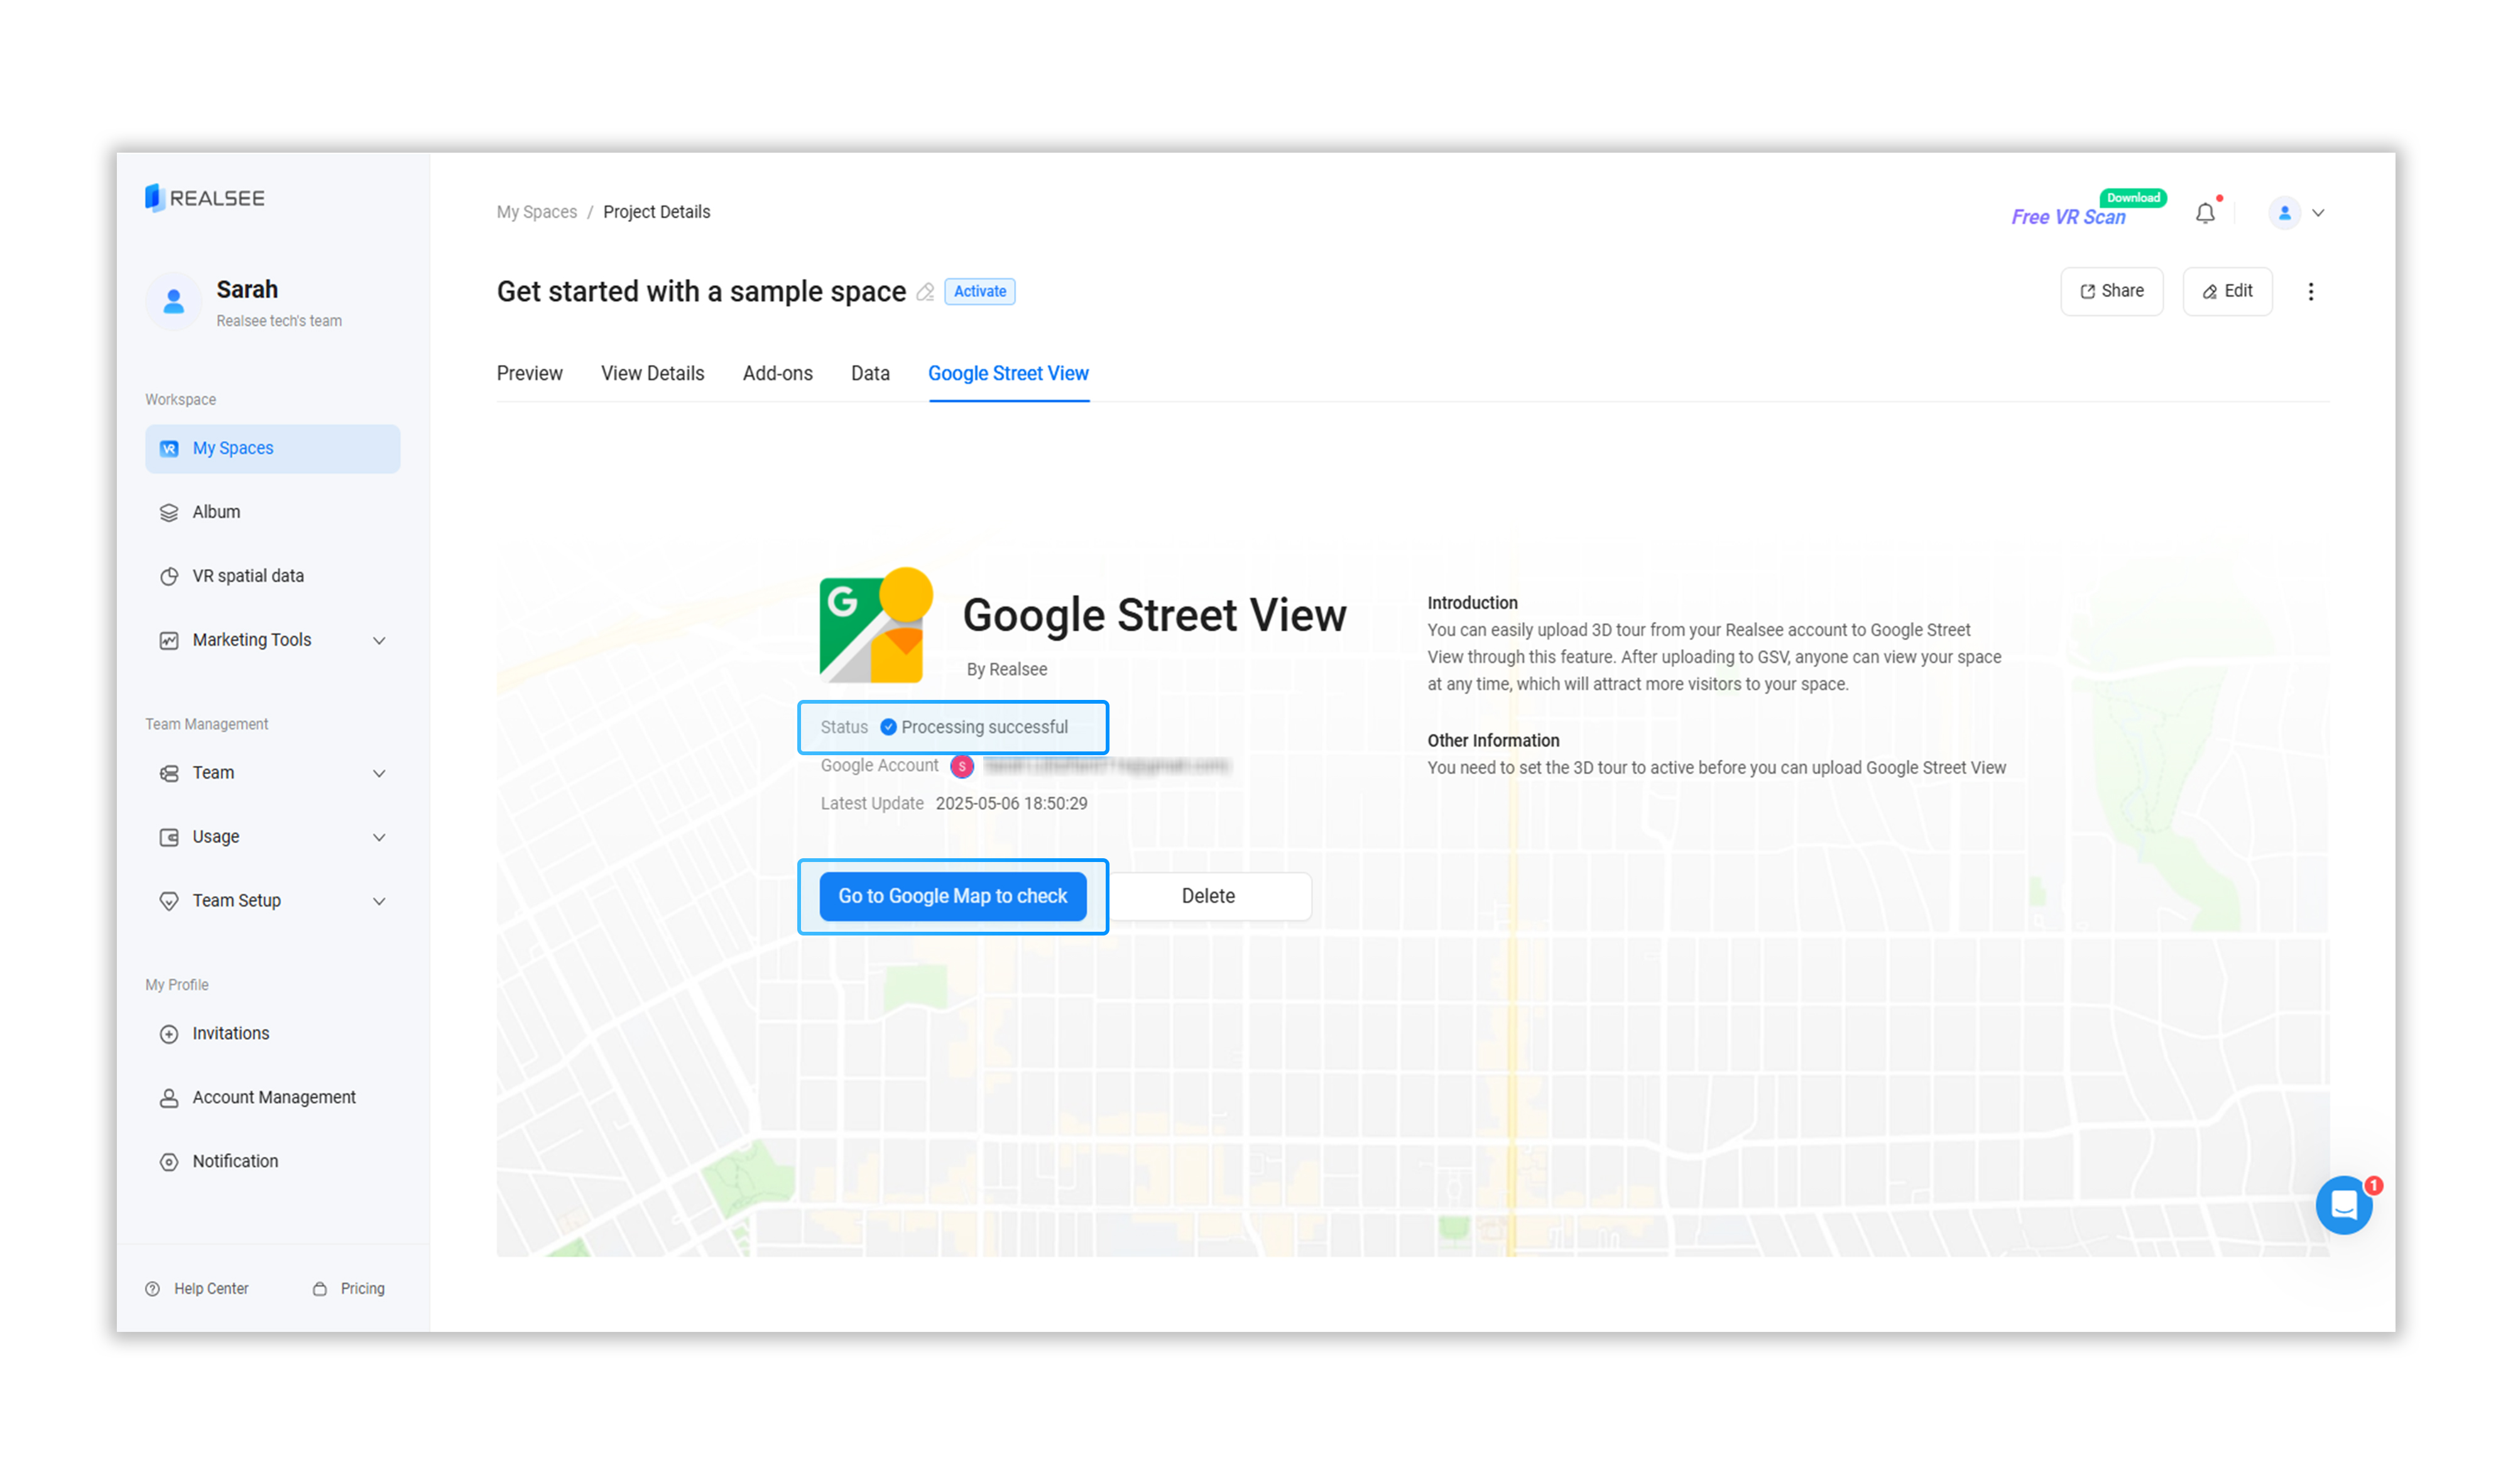
Once processing is complete, refresh the page and click Go to Google Maps to inspect your live, navigable 3D Street View tour!
Live Demo: Explore a Published Google Street View Tour
See how a Realsee 3D virtual tour comes to life directly inside Google Maps with seamless panoramic transitions.
View Live Sample on Google Maps ↗Frequently Asked Questions
Q1. How many scan spots should I use when publishing to Google Street View?
Google’s Street View Publish API applies request limits to connected applications. Each scan spot requires at least six API calls to process. Realsee is allocated a quota of 2,000 API requests, and this quota is shared across multiple client uploads throughout the day.
To keep performance and success rates high, Realsee’s Help Center recommends that you:
-
Limit each uploaded project to under 100 scan points for optimal reliability.
-
Consider splitting very large spaces into multiple projects if needed.
Q2. How long does it take for my tour to show up on Google Maps?
Processing time varies based on project size:
-
For a typical project with around 50 scan points, you can expect processing to take around 30 minutes.
-
Larger projects may require more time, depending on Google’s server load and the number of panoramas.
If your tour has not appeared after several hours, double‑check the project status and authorization, then refer to the troubleshooting tips below.
Q3. How do I remove a published tour from Google Street View?
If you need to remove or unpublish a tour:
-
Log in to Google Maps with the same Google account you used when you published the project.
-
Go to the panoramas associated with the location.
-
Use the Google Maps Support interface to delete the uploaded Street View images and tours.
See Google’s official guide: Remove photos from Google Maps.
Once the panoramas are deleted, the tour will no longer appear on Google Street View.
Q4. Can I connect multiple Google accounts to my Realsee user identity?
Currently, Realsee supports binding one Google account per Realsee user identity at a time.
If you need to switch accounts—for example, to publish different projects under different Google profiles—follow these steps:
-
Open myaccount.google.com and go to Third‑party apps & services.
-
Find Realsee and revoke authorization for the existing account.
-
Return to Realsee Console and reconnect using the new Google account you want to bind.
Each time you switch accounts, make sure the correct account is authorized with the “Publish on Google Street View” permission.
Q5. Why is my project failing to upload to Google Street View?
The most common causes of upload failures include:
-
Inactive project status:
The project is not set to Active inside Realsee Console. -
Missing Street View permission:
The “Publish on Google Street View” checkbox was not selected during Google OAuth authorization. -
Incorrect or unconfirmed location:
The property’s physical address was not correctly set, or the 3D model footprint was not properly aligned on the map.
If you’ve checked all three and the upload still fails, try:
-
Reauthorizing your Google account in Realsee Console.
-
Reducing the number of scan spots in the project.
-
Waiting and retrying after a short period in case of temporary API quota limits.